


DIY Pallet Garden

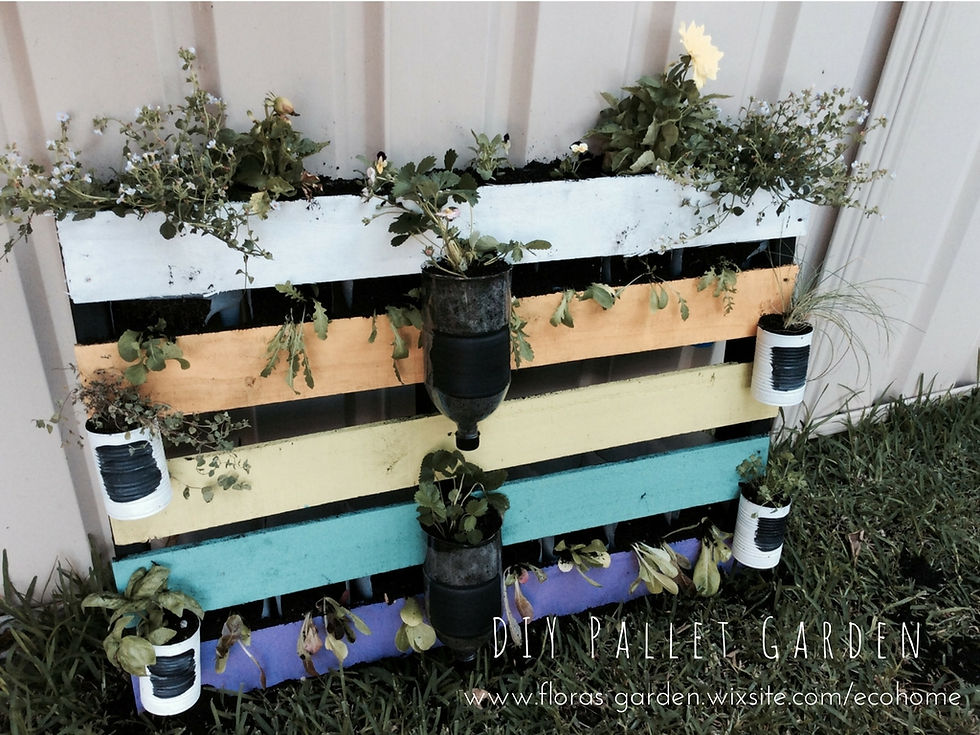

I have seen pallet gardens all over Pinterest and my mum had an old pallet in our garage, so I thought, "Why Not?" So I gathered all my supplies that I needed.
Materials:
- An old wooden pallet
- Paint (I used six different colours that I found in my garage, they were sample pots, so you don't need much.)
- Old sheets (They need to be quite large depending on where you do it. My house was under construction, and the floors were to be covered anyway, so I did it in my lounge room.)
- 4 x tin cans
- 14 x 2L milk bottles
- 2 x 2L soft drink bottles (My family went on a camp the previous weekend, and my Mum had to cater, so there were many things that I could use.)
-Various plants, including flowers and herbs. I went to Bunnings and got a few, (Make sure they have similar requirements of conditions.)
- Paint Roller & Paint Tray
- Thick art paintbrush
- Finer art paintbrush
- A few cardboard boxes to open cans of paint in
- Flat screwdriver
- Tape
- Drill
- Hammer & nails
- Crop-o-dile (to punch holes in the tin cans)
- Packet of bolts
- Packet of spring washers
- Soil (Good quality all purpose)
I know there are a lot of things needed, but they will all come together in the end.
Be sure to wear old clothes, because we are dealing with paint.
My inspirations and plans:
pallet garden2
Step 1: Preparing your pallet
Remove all labels from the milk bottles, soft drink bottles and tin cans. I used eucalyptus oil to remove the residue from the milk bottle labels, and it worked quite well. Cut the bottoms off the bottles. Paint or spray paint as desired.
Step 2: Painting the pallet
Make sure you leave the pallet to dry out. We had it sitting out in the rain for a couple of days, so we let it dry for another couple of days.
I painted it first. I did the black on the back first, because it is easier to go over colour with black than go over black with colour. Then I painted it from the top down. Let dry. (This shouldn't take long if the coat of paint is thin.)
Step 3: Constructing the pallet garden
Insert the milk bottles in the top section of the pallet. (the ones I collected fitted really well, even without screws.) Then I cut a little window on the milk bottles so that two types of plants could be in the same bottle. (This was a complete experiment, and I think it worked quite well.)
Depending on how thick the wood is on the pallet, you will need wrap tape around the drill bit, depending on how far it will go in. Drill a hole to the appropriate depth using the tape as a guide. I didn't want the screw to be seen on the other side, but our screws that we had were too large to screw all the way in. I used the spring washers to keep the screws from going all the way in, after I had had drilled the hole in the wood. If you screw the milk bottles in on both sides, it will hold well. Then I flipped the pallet around and drilled a few holes in the lid, to make a drainage system, and it can drip down into the lower section of the pallet.
I drilled holes in the soft drink bottles, but I had to nail a hole into the tin cans using a hammer and nail.
Then I screwed the painted 2L soft drink bottles and tin cans onto the pallet. (It was hard to drill a hole in the side of the cans, so I used the Crop-o-dile.)
Step 4: Planting out the pallet garden
Then I planted the flowers and herbs. Using the soil, I planted the lettuce and rocket on the bottom of the top milk bottles, and the flowers over the top of the rocket. (You will need to insert the bottom plants through the front of the pallet. It is hard to do it the other way around.)
Then I planted the herbs outside of the pallet in the 2L soft drink bottles and tin cans.
And... Voila! You have a lovely vertical pallet garden! Watering it everyday, and giving it plenty of sun, will let your plants grow properly. From a drab old pallet, to a awesome pallet garden, this DIY is lasting, and very easy to do. Thanks for reading, and Happy Crafting!

Comments